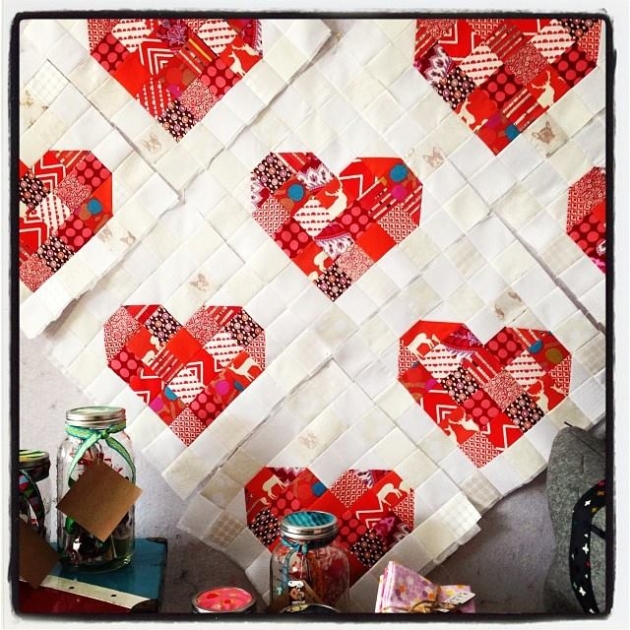
SCRAPPY HEART BLOCKS
A tutorial from Crimson Tate :: Modern Quilter
Finished block size: 14″ square
Supplies
½ yard of lightweight interfacing per block
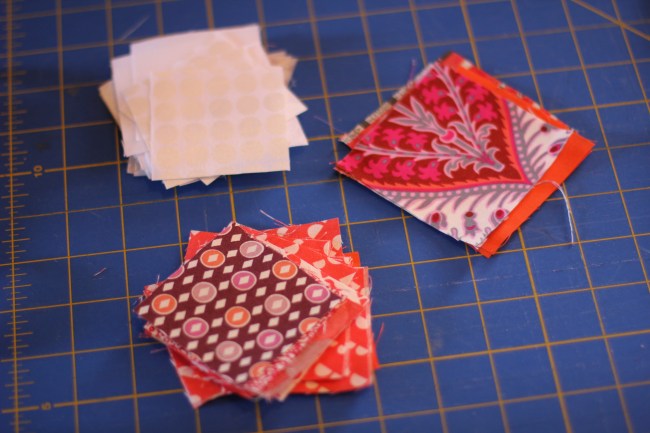
oodles of scraps of whites and reds (or if you need yardage, 1/8 yards of a goodly amount will suffice)
This quilt is perfectly suited to digging through your scrap bin and using up those oddly shaped pieces. The blocks can be as scrappy as you’d like, using as many different fabrics as you’d like. We encourage you to find at least eight different reds and five different whites, just for funsies and to create superior contrast.
If using eighth yard cuts, cut (2) 3 1/8” x 3 1/8” squares and (13) 2 ½” x 2 ½” squares from each fabric.
Cutting
To create each finished block, you will need:
(24) 2 ½” x 2 ½” white squares
(4) 3 1/8” x 3 1/8” white squares
— plus —
(17) 2 ½” x 2 ½” red squares
(4) 3 1/8” x 3 1/8” red squares
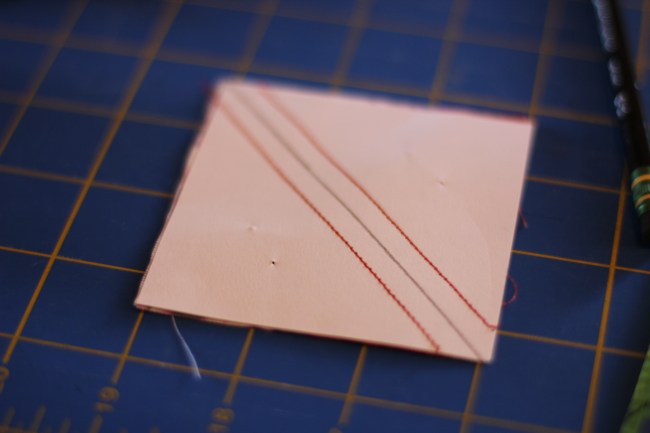
Half Square Triangles
Start by sewing the half square triangles. Draw a diagonal line across all of your 3 1/8” white squares using the 45° guide on your ruler.

It’s time to chain sew! Start with those 3 1/8″ squares using one white square and one red square (right sides together), sew a ¼” away from each side of the diagonal line


Cut along center line.

Press seams open. (We typically press our seams open around Crimson Tate, but you don’t have to be as persnickety if you absolutely hate it)
Trim half square triangles down to 2 ½” x 2 ½”.

Tip: Make your first two cuts a little bit larger than 2 ½”, then make your last two exactly 2 ½” in order to trim all four sides and remove the dog ears. See video below.
Designing Your Block
Shortcut alert! The following steps will save you oodles of time. Thanks to our friend Ellesquare who taught us this method in her Friday Night Brights quilt pattern.
On the ironing board, lay out your piece of interfacing glue side up. As you place your squares right sides up, be as careful as possible to leave the same amount of space between your squares (about 1/8”). Make sure your squares are not overlapping or touching. It will resemble a nicely tiled kitchen floor when finished.

Using the pick-and-pluck method, fuse the squares in place, taking care to not run over large areas of exposed interfacing. You may want to dig out your handy dandy pressing cloth.

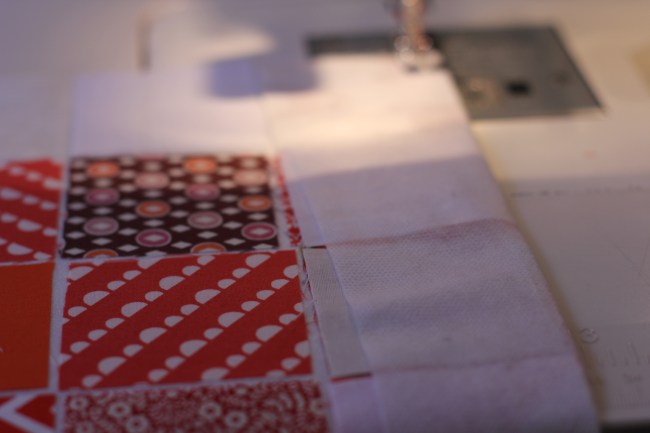
Sewing
Fold first row of squares over the second row (right sides together) and sew with a ¼” seam. Continue in this manner for each horizontal row, being sure to flip the previous rows out as to not catch them in your next seam.

On the wrong side of the block, trim a scant 1/8” from your seam allowance as to remove the folded interfacing from all six seams. 
Iron your seams open. In this instance, pressing your seam open is strongly advised – the interfacing adds a lot of bulk to the seam.
Tip: Finger press your seams open before you go for the iron. Easy-peasy!

Rinse and repeat! This time, sew the vertical columns together. Again, use a ¼” seam allowance, sew slowly, and try to keep the seams you just pressed open, well… open!


Trim seams you just sewed. Iron open seams. 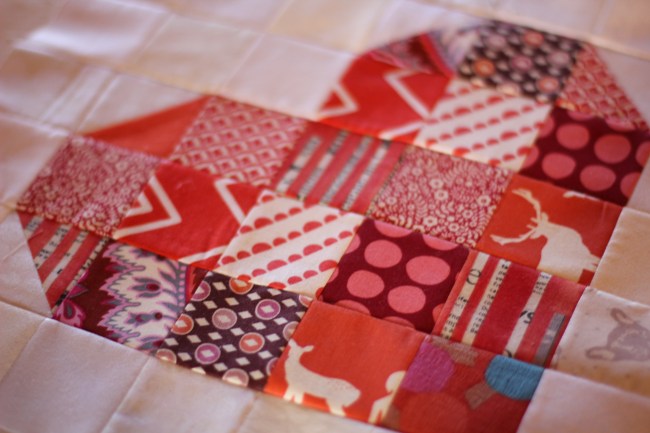
Voila! We’re done! That’s a wrap! You did it! Make Valentines for all the precious lil’ lovers in your life! Big thanks to the Quilt Guild of Indianapolis who chose the heart block as their block for February which is where we drew our inspiration.

Great block! Thanks for the tutorial…I am going to use it to make a slightly larger version for a charity quilt.
Love this! My granddaughter loves hearts. Thanks for explaining everything so well.
Looks great! I think I’ll make some pastel hearts for a baby girl a friend is expecting!
How do you put the 9 patch in every other row.
Just found this and I’m so glad you shared your tutorial. Too many quilt patterns are a download. I’m thinking of making this in bright fabrics like Kaffe Fassett fabrics. Thanks for this information. **
How cute and thanks for the shortcut!
Fantastic tutorial. Will be using this tutorial for my Grandaughters Quilts.
Thanks for the tutorial. Super cute
Oh! Now I understand. Thank you again Heather for always being incredibly kind and listening to be prattle on and on about fabric. Your shop is my favorite lunchtime de-stresser.
Thank you for this heart quilt tutorial.
I made one of these and love it!!! It’s hanging on the wall in my sewing room. First time I’ve ever used interfacing.
Wow! Just came across this from a Pinterest link. I’m going to try it! Thanks for the tutorial.
Beautiful I want to make this!!
Absolutely adorable! Thanks for sharing.
This is just so neat! ( Anyone know how I post this on my page – on F.B. to ” save” for later?????)
Thank you very much for the cute pattern. However, I needed 27 2 2/5” white squares not 24.
I think she means 28.
Just love the pattern!
Can you please give the dimensions for the 9 block please
Where is your shop Heather, city and state? Does the heart/9 patch have a name and pattern? Is there a finished picture of this simple exquisite quilt? I watched the tutorial but there’s more to this quilt. If I start soon with a pattern I just might be able to finish this in 2 years!!!
Did you ever find the dimensions for the 9 block squares?
Perfect, Just perfect. Thank you for giving me options and the knowledge of the heart patterns. I have 4 daughters, one daughter in law and a beautiful step daughter that I am making lap quilts for with all hearts on them. I am a little ADHD so I can’t do a big quilt. Thank you. Sharon P (55) yr old. Oklahoma
Your Heart Tutorial is perfect!! I think 🤔 it will make a perfect final touch for the quilt name tags…..writing on the white….
I’m making this beautiful quilt! I did not know about the interfacing when I sewed my hearts; I can see it would have made it easier! But I’m still happy with it. Any tips on attaching borders to all those bias edges?? That’s the stage I’m on now …
Oh no. I’m so sorry so much time has elapsed since you wrote this comment. Did you work it out?!?!?!
I really like this pattern. I am new to quilting and would like to know why you used interfacing for the pieces? How does it affect the quilt if you don’t use the interfacing? Thank you for sharing this. Annie
Hi, Annie! It just helps keep the pieces in a row and you can work faster. It really is just for ease.
Brand new to quilting… Can someone explain to me what the “Pick and Pluck” method is that is being described in the shortcut section? “Using the pick-and-pluck method, fuse the squares in place.” Thanks in advance if anyone can explain what this means.
Can you please tell me what the pick-and-pluck method is? Thanks
Thank you for sharing this sweet tutorial.