It’s Holiday Funtime and many of you are building stockings using a quickie pattern we put together for our stocking kits. Here’s a brief photo explanation of the the Greek written in step six!
Here’s what the finished stockings looks like. The step-out photos are of the cool frog stocking on the right:

Have you:
- Sewn exterior right sides together, clipped the curves, turned right sides out and ironed nicely?
- Sewn interior right sides together, left a small gap in the arch of the boot? (No need to clip curves or turn WST because it will always live RST)
- Sewn hanging tab using double fold and top stitch to hold together?
- Sewn cuff along short edge and folded wrong sides together with raw edge facing up? Meaning the fold is down the raw edge is up?
If you answered yes to all four questions then here is how to proceed.
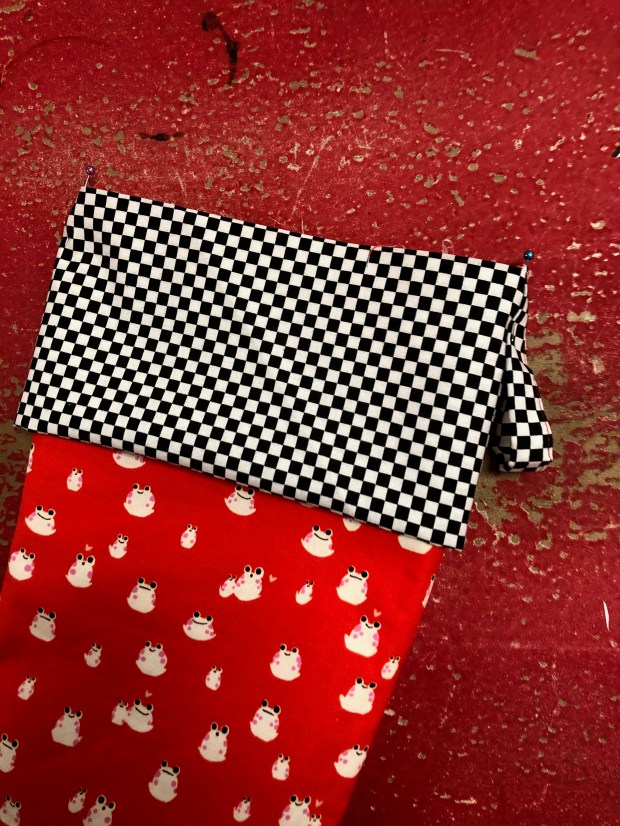
Place cuff on top of exterior fabric with all raw edges up. I like to align the seam of the cuff with the seam of the boot along the calf edge, just to make a nicer finish. See next photo.
Pin in two places with pin heads facing out of the top of the stocking.

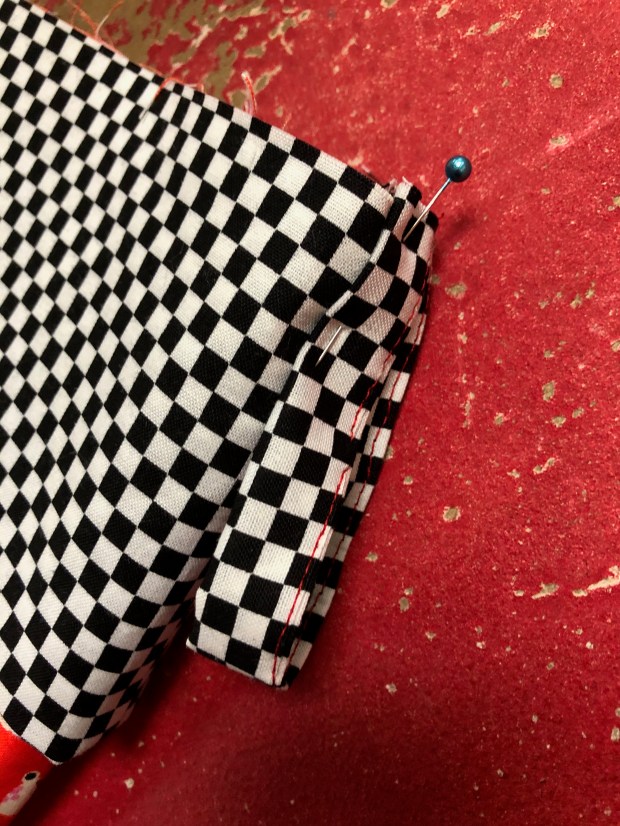
Pin hanging tab to the calf edge of the boot with raw edges up (loop facing down).
Closer view of tab
Next, on the exterior boot, roll the toe making it easier to shove into the boot lining.

Shove the exterior boot with pinned cuff and tab into the interior boot lining.

Wrangle the interior boot and the exterior boot/cuff to align the raw edges, pin together in four places making sure you don’t lose your tab! Be mindful of the tab remaining pinned in place.

Sew around upper edges securing all the layers: lining, exterior, cuff, and tab. Once sewn, pull exterior through the arch of the lining.
Yayyyyy!!!!! You did it. I’ll continue to add more detailed instruction. Yell if you have questions!


Does the pattern appear on your blog anywhere? Or can it be purchased?
Hey! If you call the store today, we can throw one in the mail to you, for sure. The cost is $5. 🙂
I can’t call until later. Can it be purchased online by any chance?
This is a ggreat post